 Back to selection
The Blackmagic Design Cinema Camera: A Review
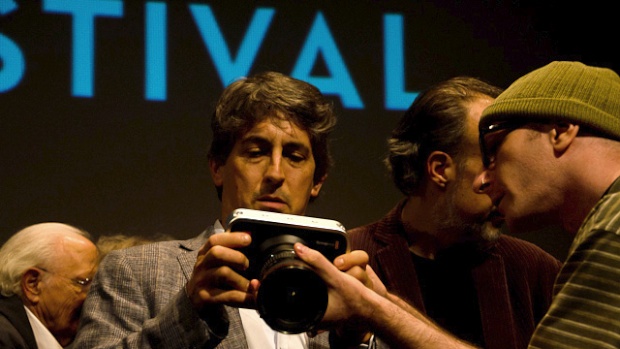
 Alexander Payne, Jamie Stuart and the Blackmagic Cinema Camera. (Photo: Matthew Schuchman.)
 The Blackmagic Design Cinema Camera is pretty much the perfect post-DSLR camera.
I spent a month with it, shooting a short film around the New York Film Festival, running around guerrilla-style, putting it through its paces, and I had a lot of fun. I liked the size and the touch screen functionality. And I liked the DaVinci Resolve 10 workflow.
The BMDCC is a camera that introduces itself from a distance. Everywhere I went with it, people either knew what it was and wanted to ask me about it, or they didn’t know what it was and wanted to ask me about it. After the Nebraska press conference, it even caught Alexander Payne’s eye, and he asked if he could check it out.
When I received the camera, I did a bunch of tests before getting started on the main project. The first thing I did was to compare its two recording formats: 2.5k RAW and 1080p ProRes HQ. 2.5k RAW won hands down. Not only was the resolution and dynamic range superior in RAW, but I could detect some fringing in the ProRes image.
Since the RAW files were too dense for me to manage on my MacBook Pro, I settled on shooting RAW, then converting the files to 2.5k ProRes 422 for the remainder of post-production. Doing it this way, as opposed to shooting ProRes from the start, gave me a much higher-quality image.

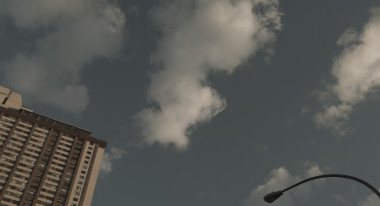
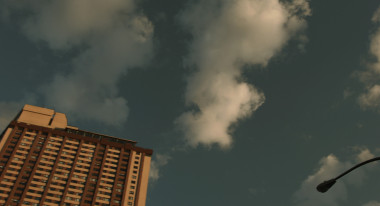
Upon ingesting the RAW files into Resolve, they were natively displayed with a Rec.709 LUT. So the first thing I did was to turn off the LUT and set all the clips to BMD Film (with highlight recovery), which is the flattest Log setting. Once I applied that to the entire timeline, I’d output the QuickTimes — and since the clips played back as they were burning, it gave me some time to review what I’d shot, as if I was watching dailies.
Anybody coming from the prosumer side familiar with converting P2 or DSLR H.264 footage should be comfortable enough with this step. It’s not a big deal or a time waste. Like I said, I enjoyed this part since it gave me a moment to relax and preview what I had.

Although Rec.709 is the HDTV picture standard, it doesn’t take a great deal of comparison to see that the dynamic range it offers versus the BMD Film setting is like night and day. Even if you choose enhanced gamma settings on Rec.709, the highlights are still always blown out, just as they are on a standard digital video camera. Another major difference is that Rec.709 is over-saturated, so in grading with it, I found myself desaturating the image — whereas with BMD Film, the color levels were so low that I had to greatly add saturation, including, sometimes, adding multiple nodes to get the levels up.
Working with the camera was as easy as any I’ve used. All of the controls are pragmatically accessible through a touch screen. Want to change the color temperature? No problem. A couple of taps, and you’re done. Want to zoom focus? Just double-tap the screen, and you’re there.
I also really liked the lens mount, which had a beautiful, clean action to it. A lot of cameras have had me jiggling the lens around a little bit to get it set. But here, it smoothly clicked right into place.
The model I worked with had an EF mount. I would’ve greatly preferred a MFT mount, however, that was unavailable to me. The mount difference created several good and bad aspects. For instance, if I’d had a MFT, I could’ve used a Speed Booster to give me an extra stop in low-light situations, and also, it would’ve opened up the crop from roughly 2.4x to a more standard 1.6x, better approximating the field of view from a Super-35 sensor, as opposed to the camera’s 15.81mm x 8.88mm sensor.
Regarding the Super-16 sensor, there’s been some concern voiced that it doesn’t have the same post-5D super-thin focus some digital shooters have become accustomed to. I honestly think that aesthetic fad is starting to wear thin (no pun intended). Most d.p.s don’t shoot wide open — they like to stop down a bit to get a cleaner image — and I found shooting wide open with the BMDCC to be roughly equivalent to that look. Furthermore, because I was often shooting myself without anybody behind the camera, having the extra depth of field made maintaining focus easier on many occasions.
Because of the 2.4x crop, I was forced to rely primarily on a wider lens. My main lens was a Canon 16-35mm, and then I supplemented that on the long end with a Canon 75-300mm zoom that, with the crop, was extended to a 720mm. (Some later pickups were shot using a Nikon 24mm and a Zeiss 18mm.) The fastest lens I used was f/2.8. If I’d shot with a Speed Booster and a 1.6x crop, I would’ve probably used high-speed primes. Gaining an extra stop on say f/1.4, would’ve had me shooting at f/1.0. In my mind, that would’ve been ideal for a lot of situations.
Although I had serious reservations about working with the 2.4x crop, I actually really loved the images I got. On the wide end, although I technically had the field of view of something approximating a 40mm, I still had the depth of the 16mm, which made the images appear wider than they really were. It also turned the long lens into a telephoto, allowing me to get close shots no matter how far away I was.
Is the camera perfect? No. I still consider it a work-in-progress. Most of the issues are well-known, and at one point or another, I had to negotiate them.

There were plenty of instances where I got the infamous black dots in overexposed areas of the frame. This was easily covered up in post. The low internal battery life wasn’t a huge factor for me, since most of my shoots were pretty quick — though there were probably half a dozen times I was required to plug in an external Anton Bauer battery to continue. Though not a problem for the upcoming Production Camera with its global shutter, with the BMDCC you’ll get a similar “Jell-O effect,” like shooting with a DSLR — but if you’re used to shooting with a DSLR, it’s no big deal. The other issues seem like things that can be addressed with simple firmware updates, like having better on-screen readouts for both the battery and SSD levels.
Speaking of using an SSD drive, make sure you get one that works well with the camera. I had two: a 256GB drive from Samsung (which at 2.5k RAW allowed 30 minutes of recording) and a 120GB Kingston, which dropped frames like crazy and was unusable unless I was shooting very quick (under 10 seconds) shots.
It’s not really a camera designed for low-light shooting, though, as I said before, using a Speed Booster on the MFT model will help. There were plenty of situations where I was forced to take the ISO to its maximum setting of 1600, and although I could see some noise, it was so fine and organic-looking that it didn’t bother me.
I edited the short using Adobe Premiere Pro CC. Initially, I tested out editing the 2.5k footage on a 1080p timeline, but ultimately chose to proceed at full resolution. Cutting a 12-minute film at 2.5k pretty much took my computer to the ceiling of its processing capabilities. There were times when the 1GB VRAM and 8GB RAM wasn’t enough, and playback would slow down or even freeze up. In those situations, I’d usually quit Premiere and reboot, or, in one case, after using After Effects for a while, I was forced to restart my computer because the cache was so spent.
Because of this, I decided not to take any chances and broke my final color correction into sections, grading individual sequences that averaged two minutes each. While that might not sound like much, I edited at a very fast pace, with shots often lasting one second or less, so it was much more work than it seems.
A big trend right now is to use LUTs that replicate various film stocks. I tried a couple of Kodak and Fuji samples but found that they crushed the blacks too hard while rendering the color in a slightly funky manner. They looked to me the way movies looked in the late ’90s, which is fine, but not what I was going for. At this point, I rather like the look of high-end cameras like ALEXA and RED — to me, that’s what a modern movie looks like.
Some DIY filmmakers have found Resolve to be too complex for them to work with. I found it very easy and straightforward. I’d always been a bit trepidatious about working with node-based programs, since some older ones had archaic structure rules, but over the summer at a Blackmagic Design event, I sat down with a colorist who took me through everything.
The most basic advice I can give anybody trying it out is to add a new node for each adjustment. So: on the first node maybe add your basic saturation and curves, then add a new node to key a color, add another for a window. And so on. This way, each adjustment is kept separate from the others, and you can change or delete nodes without affecting anything else.
Since my workflow didn’t have me roundtripping to grade in RAW, I relied on exporting an XML from Premiere, then, after grading, I exported another XML from Resolve. If you’ve ever worked with Apple Color, it’s the same basic process.
In conclusion, I really enjoyed working with the Cinema Camera and Resolve. It is not a competitor to ALEXA or RED. There’s a reason those cameras cost more. If you’re used to working with a DSLR or a 1080p camcorder, and you’re looking for an upgrade, at $2000, this is your camera. That’s really all there is to it.
