Reimagining an ID: Sound & Vision
Television stations – like distribution and production companies – can have a lot invested in their IDs. They represent the brand in the mind of the consumer.
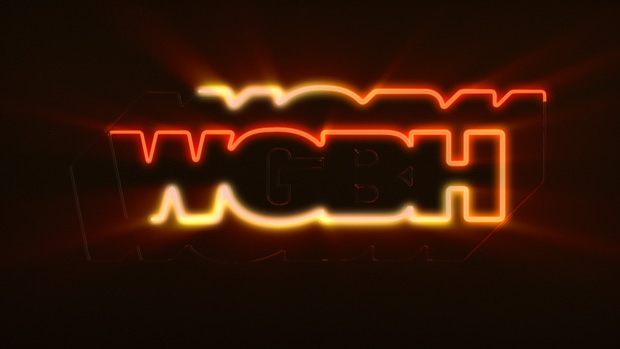
In 1972, WGBH created a station ID with a logo sting by Gershon Kingsley. That sound has become closely associated with WGBH, and they’ve made several updated IDs using that original Moog synthesizer sound through the years.
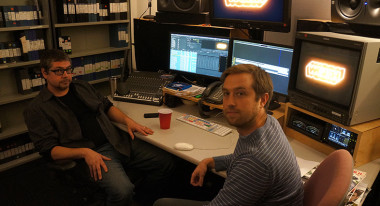
Paul Sanni, an editor for the Creative Services department and the Masterpiece series at WGBH has twice worked on revisions of the ID. Sanni has a background in audio and video and for the latest version of the ID he manipulated the audio extensively in ProTools, while still maintaining it’s original presence. Sanni did all of the sound and video editing, while Elias Mallette, TV Director for Creative Services created the animation in Cinema 4D.
Sanni and Mallette talked to us about the process they went through when creating this version of the WGBH ID as well as talking more generally about the audio and 3D creation process. You can view the ID here: WGBH Neon ID
Sanni: We originally did a version of the ID in 3D tubes back in 2002. We had a Maya animator at the time, and it was sourced from all the Gershon Kingsley sounds. The animator generated a bunch of shots of the neon tubes being filled and then we took those into our Avid system. I actually did all the sound work inside the Avid, and spat that out into a four channel Dolby SE-U4.
That was the early surround sound. It’s basically the same surround that you have in Star Wars – it’s phase inversion, phase coherence. You have what’s going to the left and the right and then anything that’s out of phase goes to the rear as a mono channel. Everything that is phase coherent, in other words you have a voice in both speakers, that’s like a phantom mono-center that gets bused to the center channel.
I had been planning to redo the ID for the WGBH theater. We had hired Elias and he works in Cinema 4D, and he and I had been working on it, redoing it in 5.1 for the theater for a while. The Associate Creative Director said to us, “Let’s use whatever you’ve got ready now for a broadcast ID,” and that’s how we came up with this one.
Elias suggestion was, “Let’s do it where it’s just kind of musical; where you have two or three passes, and have three little blips but have them be different pitches or different durations so they all have a distinct feeling and then it would come up to the full thing.”
Mallette: It stemmed off of Paul’s idea to do it in the theater, and the way that he was talking about it was like a singular piece of light that were shooting around the theater but representing that in sound. I just spun off that idea and thought, “How can you do that, but build the thing in a more musical way?”
Sanni: I took some of the sounds, and I sewed them up and spit them out, and I gave Elias a couple just to work with. And then he animated to that and kicked out his animation. It was a little bit too long so then I put the output sound and his picture back together and we did up-cuts.
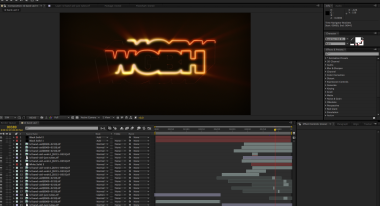
Mallette: I made the logo out of tubes in Cinema 4D, and just had to bevel out all the curves. Using his audio I animated lights going through the tubes so they would illuminate the things around them, and then I took it into After Effects and did a couple of things to clean it up.
I do most of the animation in Cinema 4D. You can move models around in After Effects but I haven’t done too much that way, because After Effects just hides things from you.
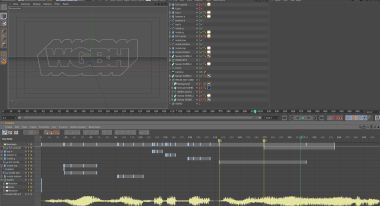
Sanni: I’ve been working with animators for many years and we often work this way. They generate footage and then we play with it and edit it, just like you would edit picture footage. So you’re doing the editorial and sound design at the same time, and then to really polish up the sound at the end, I bring it into ProTools and in ProTools you can do a lot more automation on the tracks, you can do selective EQ for little spots.
Mallette: We worked on it off and on, but it would of taken a week, maybe a little less.
Sanni: The sound work, that probably took about four days, because there’s a lot of layering in it.
What I did to cut it up was I downsampled it, I added distortion and in some places I bit crushed it. I originally tried bringing the bit rates down, but what I ended up doing is adding a little bit of noise to it and then layering it so it’s in the back, it’s in the front.
The hiss you’re hearing is a signal generator which is spitting out pink noise and that is an effect used to give it a kind of sharp sound. And then there’s a lot of internal keyboards.
And it’s in 5.1 as things are moving around, and because I don’t have a controller in here all these had to be hand key framed in. One easy way to do that is with a Wacom tablet.
There’s a couple of jump cuts and audio layered in to give it a little bit more depth. It’s easy to do in an edit system when you have it…rather than say to the animator, “I think we want to…” It comes together in the same way as in the audio room where you’re playing with sound and repeating things. Part of editorial is just playing with it and having happy accidents.
Sanni has edited several of the promos for “Masterpiece,” and he talked briefly about one promo for Mr. Selfridges which featured lots of cuts and sped-up footage.
I love doing the jump cuts. I did a spot, for Mr. Selfridges, that is all jump cuts. The thing is, it was the producers idea, so I think that primed her for me to go crazy. The jitter effect in that is easy to do. You take a huge piece of footage like ten minutes, and you condense it to 12 frames, and then you put it together with a couple of effects. These are all clichés of editing.
Mallette: Someone coined it as being hip-hop cutting.
Sanni: I love it. It’s a very easy style to do. I started out in tape, and the thing that blew me away back when I was first working at Avid, the guy sits there and he just took a phrase and overwrote it 20 times and you get that stutter effect. That was hard to do in video tape, but on these systems it’s easy. In Final Cut Pro it’s even easier, just drag with the option key.
That’s how I work in ProTools. I’ll take a sound, hold down the option key and that makes a copy of the thing and you just drag it in the timeline.
Mallette also showed some 2D animation that he created in Cinema 4D and explained that he prefers to work that way rather than working in After Effects.
Mallette: Creating vector based art in Cinema 4D is a lot easier, it’s a lot more intuitive than in After Effects. The ability to make these things and just control how they write on and write off is built into the element itself, so I am able to do the choreography a lot quicker. The animation window is a lot easier. Everything is just better. When Cinema 4D came out with these MoGraph tools, the tools just stepped up the game a whole lot.